Moon Chocolate Tips & Recipes, Blogs
How to Make Classic Half Moon Cookies: A Foolproof NY Recipe Guide
May
The original half moon cookie recipe amazingly produces 2400 cookies at once and hasn’t changed in over 80 years. These iconic treats first emerged from Hemstrought’s Bakery in Utica, New York back in 1925.
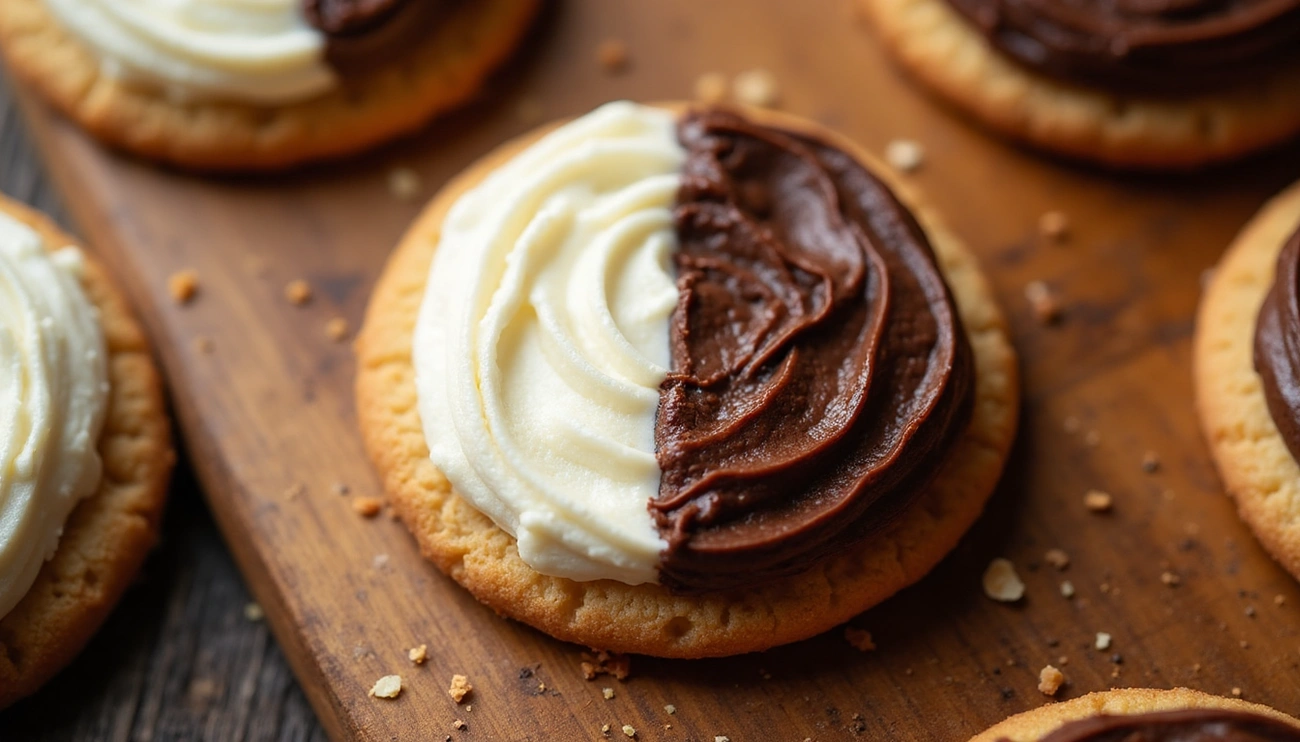
Half moon cookies, sometimes called halfmoon cookies, have always captured our imagination. These treats stand apart from their NYC relatives, the Black and White cookies. The texture is soft and cake-like instead of the dense shortbread found in their cousins. Most half moon cookies measure 3 inches across, though some giant versions stretch to 4 inches! Their unique charm comes from the frosting technique – the flat bottom gets decorated instead of the domed top, split between vanilla buttercream and chocolate fudge.
Let me share a fantastic half moon cookie recipe you can recreate in your kitchen. The original bakery recipe could feed a small army, so we’ve adjusted it to make about 30 cookies. My detailed instructions will help both experienced bakers and newcomers create these Utica classics that taste just like the originals.
Table of Contents
The Story Behind Half Moon Cookies
Image Source: Holland Farms
The sweet legacy of half moon cookies started in Utica, New York. This small city’s creation continues to delight people today.
Where they originated and why they matter
Harry B. Hemstrought, a former architect, brought half moon cookies to life in 1920 after opening his bakery on Genesee Street in Utica. His signature creation – a soft, cake-like cookie with dual frosting – won local hearts quickly. The secret recipe Hemstrought created has stayed almost the same for over a century.
These cookies hold a special place in Upstate New York’s culture. People who move away from the Mohawk Valley miss the taste of half moon cookies the most. They’ve grown beyond just a dessert and now stand as a symbol of regional pride and food heritage.
The half moon cookie recipe means so much that bakers have passed it down through generations. Authentic half moon cookies come fresh from the oven each morning using all-natural ingredients. This tradition connects today’s bakers with those who lived a century ago.
Half Moon vs. Black and White cookies
Half moon cookies are different from their NYC counterparts by a lot, though they might look alike. People often mix them up because both have two-tone frosting, but clear differences set them apart:
Half moon cookies feature:
- A soft, pillowy devil’s food cake base (chocolate is traditional, though vanilla exists too)
- Thick, rich buttercream frosting (vanilla) and chocolate fudge frosting
- A slightly domed shape with frosting on the flat side
- Origins in Upstate New York (Utica specifically)
Black and white cookies have:
- A firmer, shortbread-like texture
- Thin fondant or royal icing that’s glossy and sometimes waxy
- A completely flat shape
- Origins tied to NYC and Jewish bakery traditions
Never call a half moon cookie a black and white – Upstate New Yorkers see this as a serious food mistake! A local source makes it clear: “Don’t even think of calling these Black & Whites!“.
Half moons still rule Central New York’s cookie scene today, and you’ll find them at popular grocery stores like Wegmans.
Making the Perfect Cookie Base
Image Source: – Cooking With Karli
A perfect chocolate base makes these traditional half moon cookies special. The taste balances sweetness and bitterness to create an authentic Upstate New York flavor.
Ingredients for the chocolate cookie
You’ll need these items to make your half moon cookies:
- 3¾ cups all-purpose flour
- ¾ teaspoon baking powder
- 2 teaspoons baking soda
- 2¼ cups sugar
- 1 cup unsalted butter (at room temperature)
- ¾ cup cocoa powder (sifted)
- ¼ teaspoon salt
- 2 eggs (at room temperature)
- 1 teaspoon vanilla extract
- 1½ cups milk or buttermilk
Room temperature butter and eggs play a vital role in getting the right consistency. Let these ingredients sit out for about 30 minutes before you start baking.
Mixing and preparing the dough
Start by heating your oven to 350°F and line your baking sheets with parchment paper. Sift the flour, baking powder, and baking soda together in a medium bowl.
Your stand mixer needs the paddle attachment to cream the butter and sugar until they become light and fluffy – this takes about 2-3 minutes. Mix in the sifted cocoa powder and salt until they blend well.
Beat in the eggs one by one, add the vanilla extract, and mix after each addition. The flour mixture and milk should go in alternating batches. Start and end with flour (half flour, half milk, remaining flour, then remaining milk). Mix just enough to combine – too much mixing makes tough cookies.
Shaping and baking the cookies
The batter should be thicker than cake mix but softer than regular cookie dough. Drop portions onto your prepared sheets using a 2-tablespoon cookie scoop or ¼ cup measure. Leave 2-3 inches between cookies since they spread quite a bit.
Smooth the top of each mound with a small spatula or spoon’s back. Real half moon cookies should spread to about 3 inches across.
These cookies need 10-12 minutes in the oven. They’re ready when they spring back from a light touch while staying soft on top with a cake-like texture. Let them rest on the baking sheet for 5 minutes, then move them to a wire rack. Make sure they cool completely before you frost them.
Frosting Like a Pro
Image Source: The Hint of Rosemary
The signature two-toned frosting reshapes the scene from ordinary cookies to authentic half moon cookies. Your cookies need to cool down before you create that classic black and white finish. These treats become instantly recognizable with this finishing touch.
How to make vanilla buttercream
The quickest way to make vanilla buttercream that spreads smoothly yet holds its shape needs:
- ½ cup softened unsalted butter
- 1½-2⅔ cups confectioners’ sugar (sifted)
- 1-2 tablespoons milk or heavy cream
- 1 teaspoon vanilla extract
- Pinch of salt
Start by creaming the butter until smooth with an electric mixer. Mix the confectioners’ sugar, vanilla, and salt gradually while alternating with milk. The mixture should become creamy without any lumps. You want a thick yet spreadable consistency – just like Nutella but slightly firmer. This firmness is a vital part of creating that defined line between vanilla and chocolate sides.
How to make chocolate fudge frosting
Traditional chocolate half moon cookies give you two options:
- Quick method: Split your vanilla frosting in half and add ⅓ cup cocoa powder plus 1-2 tablespoons extra milk. Beat everything until smooth.
- Rich fudge method: Melt chocolate chips with butter in a double boiler. Mix in powdered sugar, corn syrup, vanilla, and salt. Add hot water one tablespoon at a time until the frosting creates thick ribbons.
Keep in mind that the chocolate frosting should be thicker than the vanilla side.
Tips for spreading and dividing the icing
The flat bottoms of the cookies are the foundations of authentic half moon cookies, not the domed tops. This flat surface helps create that clean division.
The best results come from:
- Using a small offset spatula that gives better control
- Starting with one flavor first (usually vanilla)
- Letting cookies chill for 15 minutes before the second frosting
- Creating a perfect line by covering the first frosting with wax paper while adding the second
A quick freeze makes handling easier since the cake-like texture can be delicate. Let the icing set completely before you stack or store your half moon cookies.
Learn more in our “Dark Chocolate Benefits: What Science Really Says About Your Favorite Treat” article.
Finishing Touches and Storage Tips
Image Source: Smitten Kitchen
The finishing touches transform ordinary cookies into authentic half moon cookies. These final details will give your cookies a professional look and the best possible taste.
Why frost the flat side of the cookie
Half moon cookies come with an interesting tradition – bakers always frost the flat bottom instead of the domed top. This practice runs deep in tradition and represents the authentic way to ice these treats. All but one of these bakeries in Upstate New York follow this method, which traces back to the original recipe. The flat bottom creates an ideal canvas that makes the half-and-half frosting look perfect. Just remember to flip each cookie over before you add the vanilla and chocolate frostings when making these at home.
Letting the icing set properly
Your patience matters when finishing half moon cookies. Let the frosting set at room temperature for about 15 minutes. The refrigerator can help speed up this process. Many bakers suggest a two-step frosting method – “put on a thin layer, a crumb layer, at first and let it firm up. Then add a second layer”. This approach keeps crumbs out of the frosting and creates a cleaner look. The icing must set completely before you stack or store your cookies.
How to store or freeze half moon cookies
Your half moon cookies will stay fresh in an airtight container at room temperature for up to two weeks. You have several options to store them longer:
- Refrigeration: Keep frosted cookies fresh in the fridge for 3-4 days
- Unfrosted storage: Store unfrosted cookies at room temperature for 3-4 days and add frosting before serving
- Freezing: These cookies freeze well for up to two months
The frosted cookies need special care when freezing. Let the icing harden fully, then place them on a parchment-lined baking sheet in the freezer for an hour. You can then move them to a freezer-safe container with parchment paper between layers. The cookies taste best when you let them thaw at room temperature for 30-40 minutes before serving.
Conclusion
Half moon cookies represent a treasured part of Upstate New York’s food heritage. This piece explores their rich history that began in 1925 at Hemstrought’s Bakery and highlights the distinctive features that make them different from their NYC counterparts.
Creating the perfect half moon cookie depends on a few essential elements. The chocolate base needs a cake-like consistency with its signature soft texture. The striking contrast between smooth vanilla buttercream and dark chocolate fudge frosting gives these treats their distinctive look. The authentic tradition calls for frosting the flat bottom instead of the domed top, which makes these cookies unique.
The effort to make half moon cookies is without doubt worth every minute. Your friends and family will definitely enjoy this sweet taste of Utica’s history.
Each attempt at making these cookies brings better results. My first batch looked nothing like the ones from the bakery. You can store them at room temperature for a few days or freeze them to enjoy later. Every delicious bite of these half moon cookies takes you right back to central New York.
